These notes serve as a walkthrough for people that ---who like me--- are not Python developers, but would like to run Stable Diffusion in their own machine.
The goal being to be able to type something like:
python scripts/txt2img.py --prompt "a photograph of an astronaut riding a horse" --plms
And get a picture out of that. 😃
Prerequisites
From what can be read on their repo's requirements,
they ask for a suitable conda environment.
If you are not a Python developer, then good luck
following down that rabbit hole.
But, from what I could quickly gather, looks like miniforge
is the way to go.
Let's set it up the easy way, with asdf.
Install asdf
Clone and install from the AUR:
cd ~/tmp
git clone https://aur.archlinux.org/asdf-vm.git
cd asdf-vm/
makepkg -si
Add some lines to your .profile and .bashrc files:
echo -e '\nexport PATH="${ASDF_DATA_DIR:-$HOME/.asdf}/shims:$PATH"' >> ~/.profile
echo -e '\n. <(asdf completion bash)' >> ~/.bashrc
Make changes effective immediately with:
source ~/.profile
exec $SHELL
Update asdf
To update to the latest stable version just redo the process above.
Weight / model files
Here are the links to the available weights from CompVis in Hugging Face.
You can use only the latest checkpoint (1.4), or if interested in contrasting the results from the other ones, you can download them all.
Just beware, each file is around 4gb.
To have access to the .ckpt downloads, follow the links that
contain -original in the name, like:
-
stable-diffusion-v-1-1-original Here download the file: sd-v1-1.ckpt
-
stable-diffusion-v-1-2-original Here download the file: sd-v1-2.ckpt
-
stable-diffusion-v-1-3-original Here download the file: sd-v1-3.ckpt
-
stable-diffusion-v-1-4-original Here download the file: sd-v1-4.ckpt
And put them in a ~/development/stable-diffusion-weights
directory or something.
We'll use them soon.
Set up Stable Diffusion
Clone the Stable Diffusion repo and cd into it:
git clone https://github.com/CompVis/stable-diffusion.git ~/development/stable-diffusion
cd ~/development/stable-diffusion
Link a model
We need to create a folder for the model and link one of the previous downloads:
cd ~/development/stable-diffusion
mkdir -p models/ldm/stable-diffusion-v1
ln -sf ~/development/stable-diffusion-weights/sd-v1-4.ckpt models/ldm/stable-diffusion-v1/model.ckpt

# You can link a different model at any time:
# ln -sf ~/development/stable-diffusion-weights/sd-v1-1.ckpt models/ldm/stable-diffusion-v1/model.ckpt
# ln -sf ~/development/stable-diffusion-weights/sd-v1-2.ckpt models/ldm/stable-diffusion-v1/model.ckpt
# ln -sf ~/development/stable-diffusion-weights/sd-v1-3.ckpt models/ldm/stable-diffusion-v1/model.ckpt
Install miniforge
Let's follow that up with installing miniforge:
asdf plugin add python
asdf list-all python
asdf install python miniforge3-22.11.1-4
asdf local python miniforge3-22.11.1-4
Notice we used asdf local instead of asdf global.
That is because we want miniforge enabled only when
we're inside ~/development/stable-diffusion directory.
Set up the conda environment
Now that we have the conda command available, let's set up
the conda environment:
conda env create -f environment.yaml
To activate the ldm environment, conda needs some
one-time set up first:
conda init bash
The conda init bash command will add something like this
to your .bashrc:
# >>> conda initialize >>>
# !! Contents within this block are managed by 'conda init' !!
__conda_setup="$($ASDF_DIR+'/installs/python/miniforge3-22.11.1-4/bin/conda' 'shell.bash' 'hook' 2> /dev/null)"
if [ $? -eq 0 ]; then
    eval "$__conda_setup"
else
    if [ -f "$ASDF_DIR/installs/python/miniforge3-22.11.1-4/etc/profile.d/conda.sh" ]; then
        . "$ASDF_DIR/installs/python/miniforge3-22.11.1-4/etc/profile.d/conda.sh"
    else
        export PATH="$ASDF_DIR/installs/python/miniforge3-22.11.1-4/bin:$PATH"
    fi
fi
unset __conda_setup
# <<< conda initialize <<<
Which, I prefer to extract to a file like ~/bin/sourceconda
and source it only when needed. Like this:
cd ~/development/stable-diffusion
source ~/bin/sourceconda
conda activate ldm
Generate an image from a prompt
Let's try it out, shall we.
If you open a new terminal, you'll need to:
cd ~/development/stable-diffusion
source ~/bin/sourceconda
conda activate ldm
With the environment appropriately set up, you can run the script now:
python scripts/txt2img.py --prompt "a photograph of an astronaut riding a horse"
After a few secs, we'll get something like:
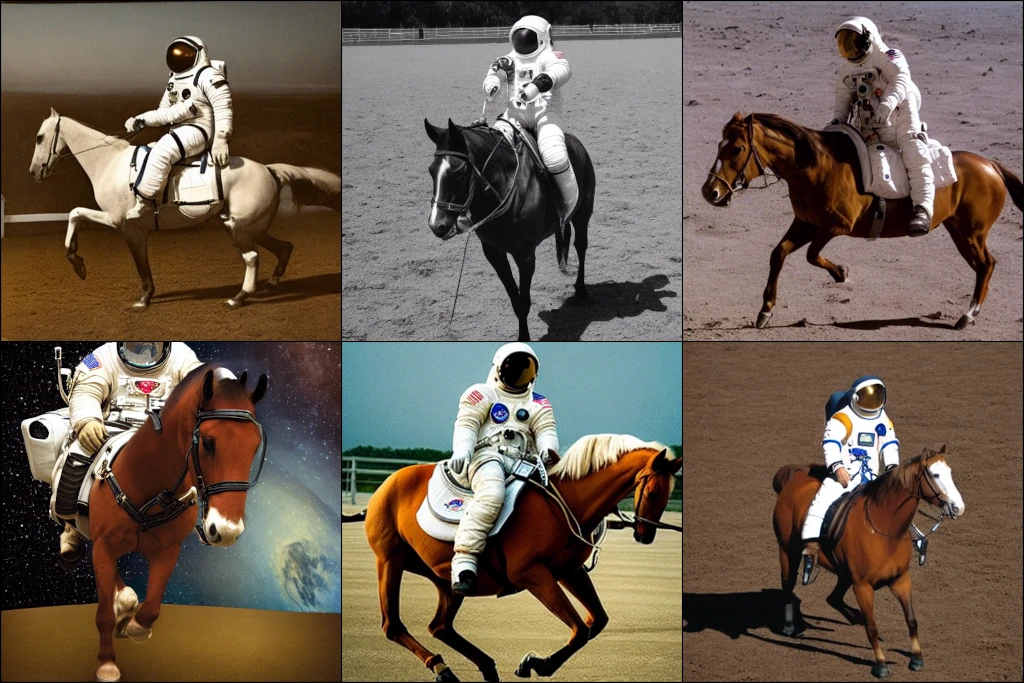
Congratulations, you can add AI artist to your CV now! 🎉 😉
Deactivate the NSFW filter
If you get some Rickroll images for some prompts, that's the NSFW (Not Safe For Work) check kicking in.
You can deactivate it in two ways:
By replacing a line of code in scripts/txt2img.py:
#x_checked_image, has_nsfw_concept = check_safety(x_samples_ddim)
x_checked_image = x_samples_ddim
Or ---an arguably better way because you skip loading the safety model entirely--- is by changing a few lines of code:
# load safety model
# safety_model_id = "CompVis/stable-diffusion-safety-checker"
# safety_feature_extractor = AutoFeatureExtractor.from_pretrained(safety_model_id)
# safety_checker = StableDiffusionSafetyChecker.from_pretrained(safety_model_id)

# ...

def check_safety(x_image):
    return x_image, False
    # safety_checker_input = safety_feature_extractor(numpy_to_pil(x_image), return_tensors="pt")
    # x_checked_image, has_nsfw_concept = safety_checker(images=x_image, clip_input=safety_checker_input.pixel_values)
    # assert x_checked_image.shape[0] == len(has_nsfw_concept)
    # for i in range(len(has_nsfw_concept)):
    #     if has_nsfw_concept[i]:
    #         x_checked_image[i] = load_replacement(x_checked_image[i])
    # return x_checked_image, has_nsfw_concept
Troubleshooting
If you get this error when trying to run the script:
ImportError: cannot import name 'SAFE_WEIGHTS_NAME' from 'transformers.utils'
You need to install a specific version of diffusers for it to work.
Try this:
pip install diffusers==0.12.1
If you have an old card, or low VRAM capacity, try
passing the --n_samples 1 parameter to the script:
python scripts/txt2img.py --prompt "a photograph of an astronaut riding a horse" --n_samples 1
Stable Diffusion UI
If running from the CLI is not your cup of tea, or you get tired of running the command then going into your file explorer to browse the results, you might find the following frontends useful:
- Stable Diffusion web UI (this one I've tried)
- Easy Diffusion (haven't tried this one yet)
That's it for now.
Happy prompting! 😎